- how to implement authentication and authorization checks within our GraphQL API resolver functions
In order to follow this tutorial, you must use Webiny version 5.18.0 or greater.
The code that we cover in this section can also be found in our GitHub examples repository  . Also, if you’d like to see the complete and final code of the application we’re building, check out the
 full-example folder.
Overview
At the moment, all pins-related queries and mutations that were created during the Extend GraphQL API scaffolding process are publicly accessible.
In the GraphQL API section of this tutorial, we’ve used the Extend GraphQL API scaffold to extend our GraphQL API and introduce essential CRUD GraphQL queries and mutations.
For example, if were to perform the following CreatePin GraphQL mutation, we would be able to create a new pin, with no user tied to it:
mutation CreatePin($data: PinCreateInput!) {
  pins {
    createPin(data: $data) {
      id
      title
      description
      createdBy {
        id
        type
        displayName
      }
    }
  }
}{
"data": {
"title": "A New Pin",
"description": "This is a new pin."
}
}Once run, we should receive a response similar to the following (the only piece of information that should be different on your end should be the returned id):
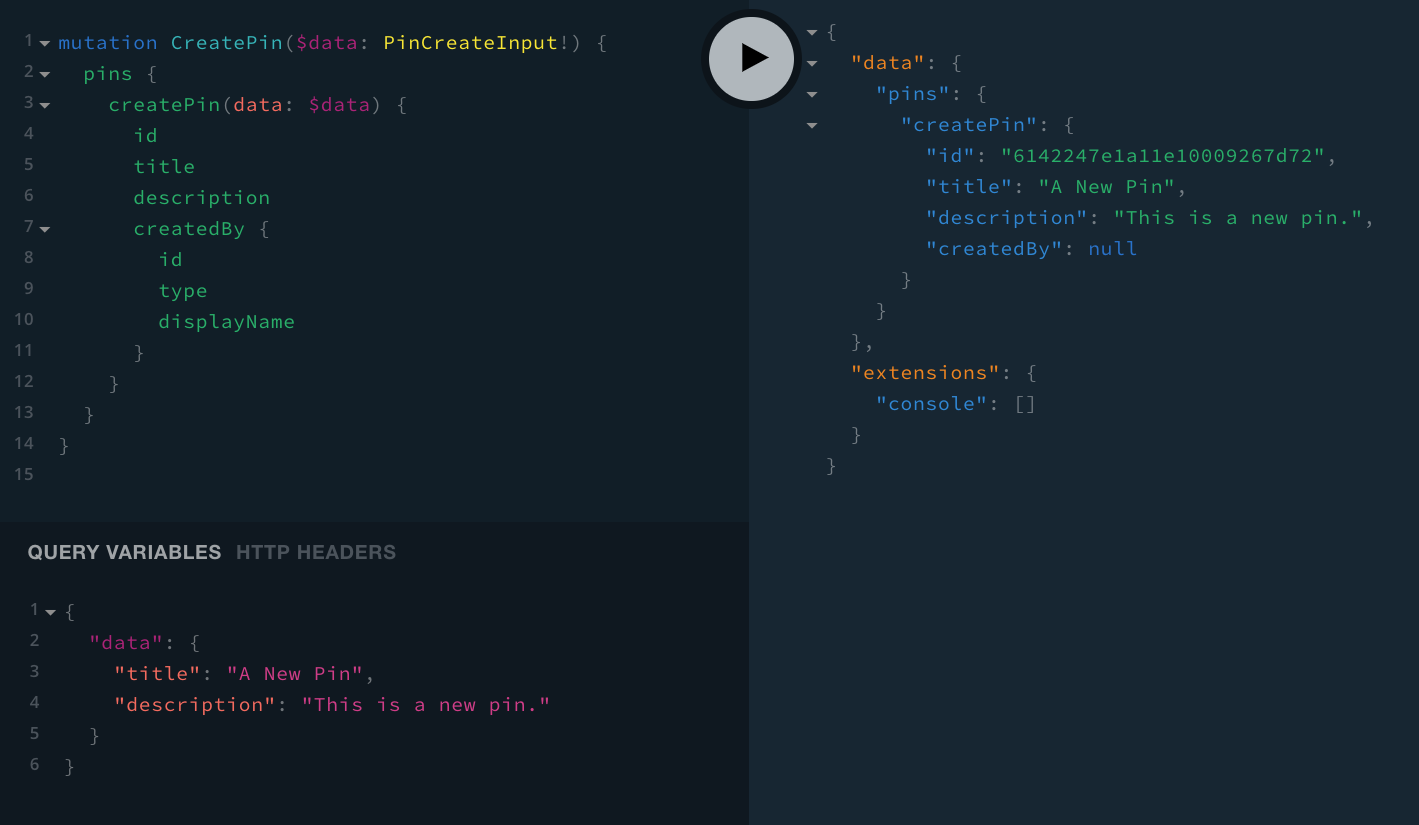
And that’s not all. Anonymous users can even change the information on pins created by other users, and even delete them! This is certainly not what we’d expect of a modern application nor from any kind of application at all.
So, in this final section of the tutorial, we’ll implement the necessary authentication and authorization checks, which will ensure users can perform the sensitive GraphQL mutations, only if they’re really allowed to.
Note that by sensitive GraphQL mutations, we mean the following:
createPin(data: PinCreateInput!): Pin!updatePin(id: ID!, data: PinUpdateInput!): Pin!deletePin(id: ID!): Pin!
All of the resolver functions for these mutations are located in the PinsMutationResolver class, located in the pinterest-clone/api/code/graphql/src/plugins/scaffolds/pins/resolvers/PinsMutation.ts file, and this is where we’ll perform all of the changes in the sections that follow.
Before We Begin - A Note on Testing
In the following couple of sections, we’ll manually test the changes that we’ll perform. After a change has been performed, via the GraphQL Playground GraphQL client, we’ll manually issue GraphQL queries and mutations, both as signed in and anonymous users.
When it comes to signed in users, in order to simulate one, we’ll need to add the authorization header via the HTTP Headers tab:
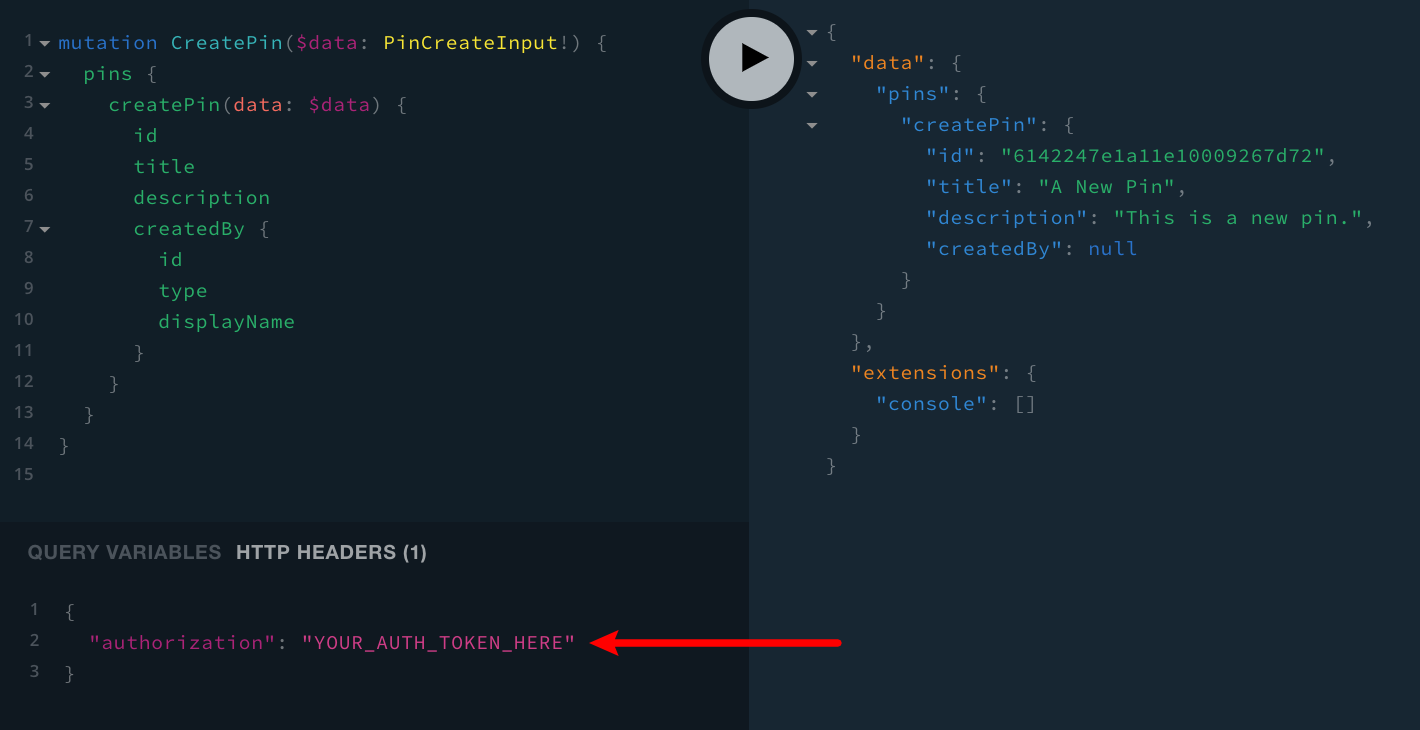
{
    "authorization": "YOUR_AUTH_TOKEN_HERE"
}
The value of the header is a base 64 encoded JWT token, which we should be able to easily retrieve via Google Chrome DevTools .
Other browsers also offer their own versions of development-related tools. For example, Firefox Browser has Firefox Developer Tools . Be sure to check your browser’s documentation for more information.
To retrieve the token, follow these steps:
- sign in to the React application with your web browser
- open Google Chrome DevTools (how to I open it? )
- in the Network tab, from the list of all HTTP requests, pick any POST request directed at our GraphQL API’s URL (if you’re not seeing any, simply refresh the page)
- in the Headers tab, you should be able to find the token in the Request Headers section (
authorizationheader)
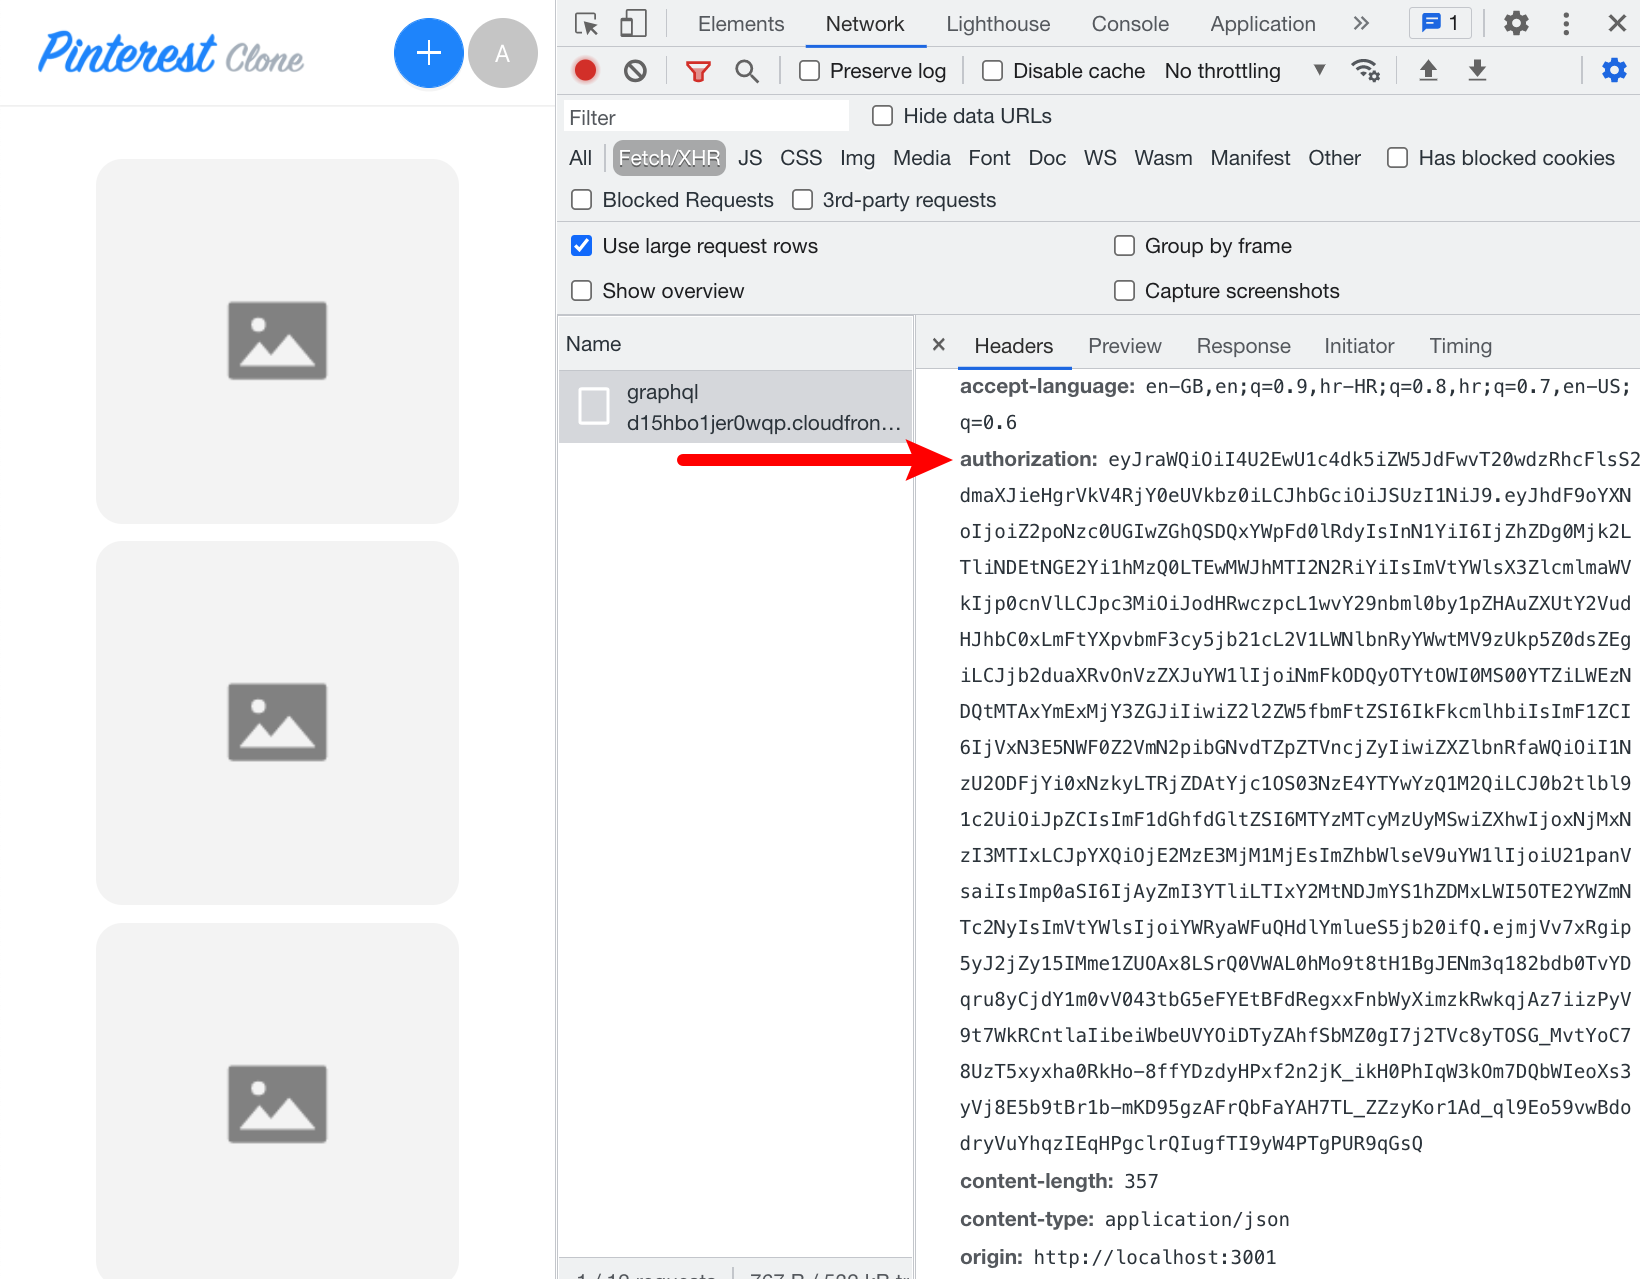
Once you’ve found it, simply copy and paste the token into the GraphQL playground as shown in the above screenshot, and you should be good to go.
Creating Pins
Let’s start with the createPin(data: PinCreateInput!): Pin! mutation. In order to make it secure, we’ll apply the following changes to the createPin resolver function:
/** * Creates and returns a new Pin entry. * @param data */async createPin({ data }: CreatePinParams) {  // Before doing anything, let's make sure the user is signed in.  const { authentication } = this.context;  const identity = await authentication.getIdentity();  if (!identity) {      throw new Error("Not authenticated.");  }
  // We use `mdbid` (https://www.npmjs.com/package/mdbid) library to generate  // a random, unique, and sequential (sortable) ID for our new entry.  const id = mdbid();
  const pin = {      ...data,      PK: this.getPK(),      SK: id,      id,      createdOn: new Date().toISOString(),      savedOn: new Date().toISOString(),      createdBy: {          id: identity.id,          type: identity.type,          displayName: identity.displayName      },      webinyVersion: process.env.WEBINY_VERSION  };
  // Will throw an error if something goes wrong.  await Pin.put(pin);
  return pin;}
As we can see, we made two additions to the existing application code. First, we are retrieving the signed in user, via the await authentication.getIdentity(); call. This is something we’ll add to the remaining two resolver functions too, as we immediately want to throw an error if the user is not signed in.
We’ve also updated the pin object, where we added the createdBy property, and assigned an object with user information to it. By doing this, we’re tying every created pin to a user, which will be very important once we get to the remaining two resolver function.
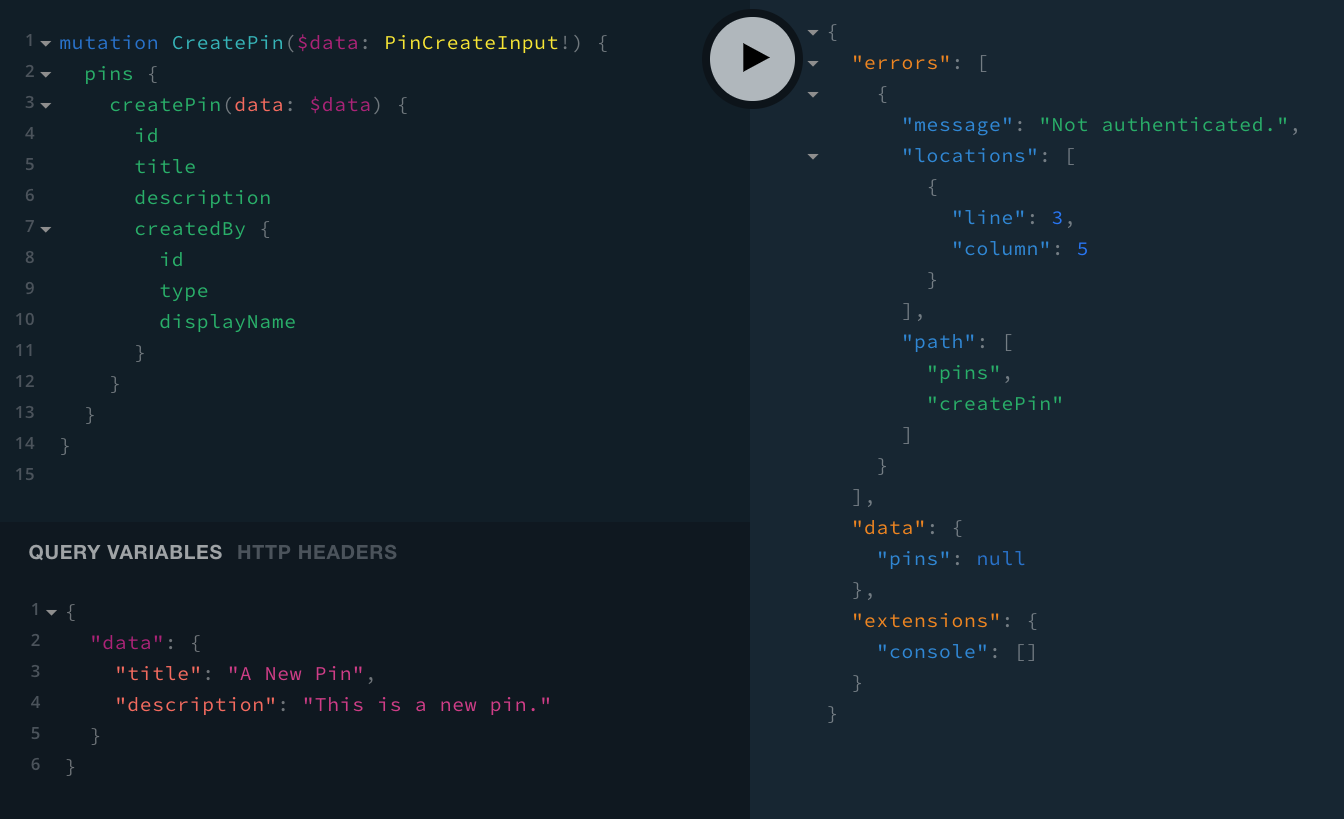
With all of the changes in place, while not signed in, performing the same CreatePin mutation, should give us the following Not authenticated. error response:
On the other hand, if we were perform the same mutation, but this time as a signed in user, we should receive the following response:
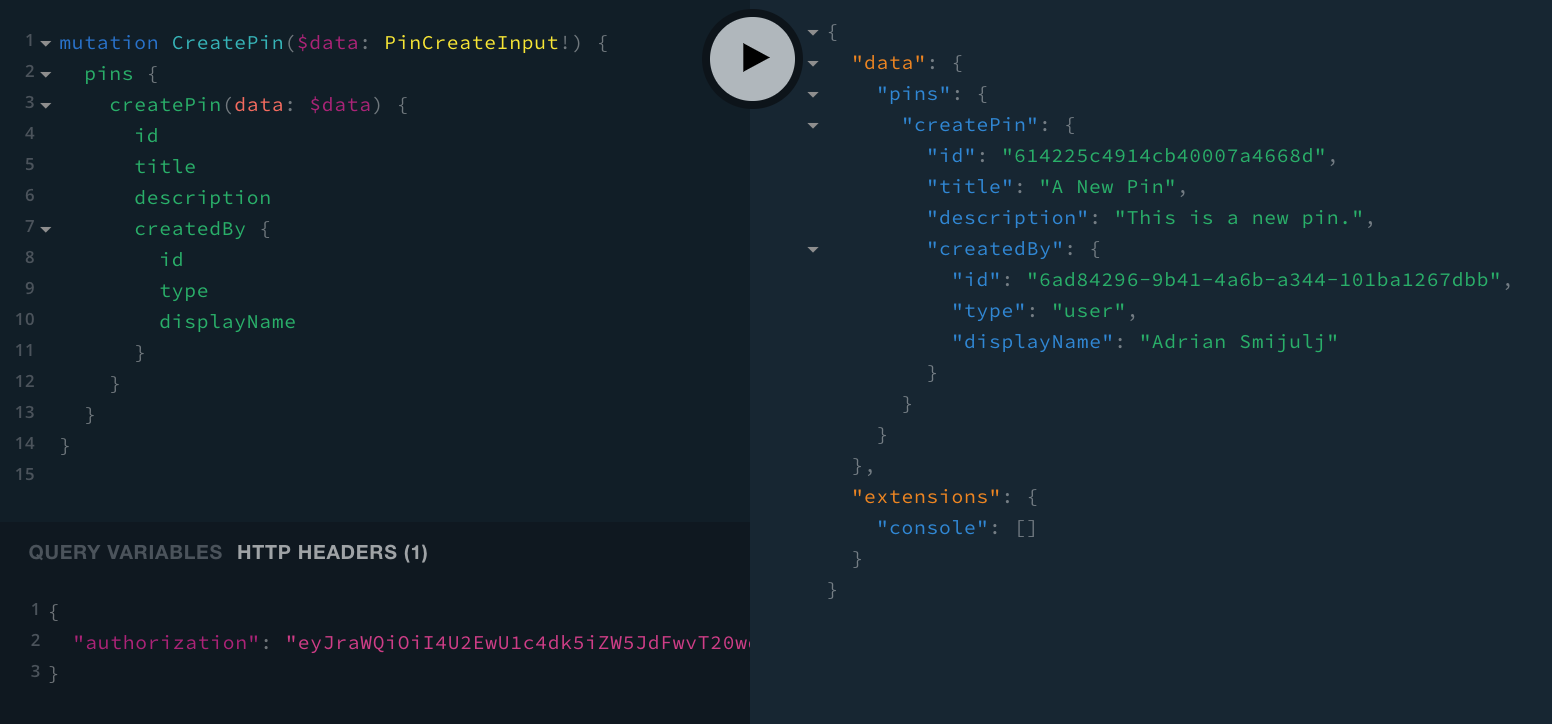
If that’s true, that means everything is in order, and we can continue with updating the next resolver function in line, and that’s updatePin .
Updating Pins
Next up - the updatePin(id: ID!, data: PinUpdateInput!): Pin! mutation.
Apart from the initial signed in user check that we also performed in the previous resolver function, in the updatePin resolver function, we also need to check whether the pin that’s about to be updated actually belongs to the signed in user. Note that in order to perform this check, we actually need to retrieve the pin from the database and inspect its createdBy field, which we’ve defined in the previous section of this tutorial.
/** * Updates and returns an existing Pin entry. * @param id * @param data */async updatePin({ id, data }: UpdatePinParams) {  // Before doing anything, let's make sure the user is signed in.  const { authentication } = this.context;  const identity = await authentication.getIdentity();  if (!identity) {      throw new Error("Not authenticated.");  }
  // If entry is not found, we throw an error.  const { Item: pin } = await Pin.get({ PK: this.getPK(), SK: id });  if (!pin) {      throw new Error(`Pin "${id}" not found.`);  }
  if (pin.createdBy.id !== identity.id) {      throw new Error("Not authorized.");  }
  const updatedPin = { ...pin, ...data };
  // Will throw an error if something goes wrong.  await Pin.update(updatedPin);
  return updatedPin;}
If the retrieval of the requested pin failed, then we can immediately exit with an appropriate error message.
So, via the UpdatePin mutation, if we tried to update a pin that was created by another user, we should receive the Not authenticated. error response:
mutation UpdatePin($id: ID!, $data: PinUpdateInput!) {
  pins {
    updatePin(id: $id, data: $data) {
      id
      title
      description
      createdBy {
        id
        type
        displayName
      }
    }
  }
}{
"id": "PASTE_PIN_ID_HERE",
"data": {
"title": "A New Pin UPDATED",
"description": "This is a new pin. UPDATED"
}
}
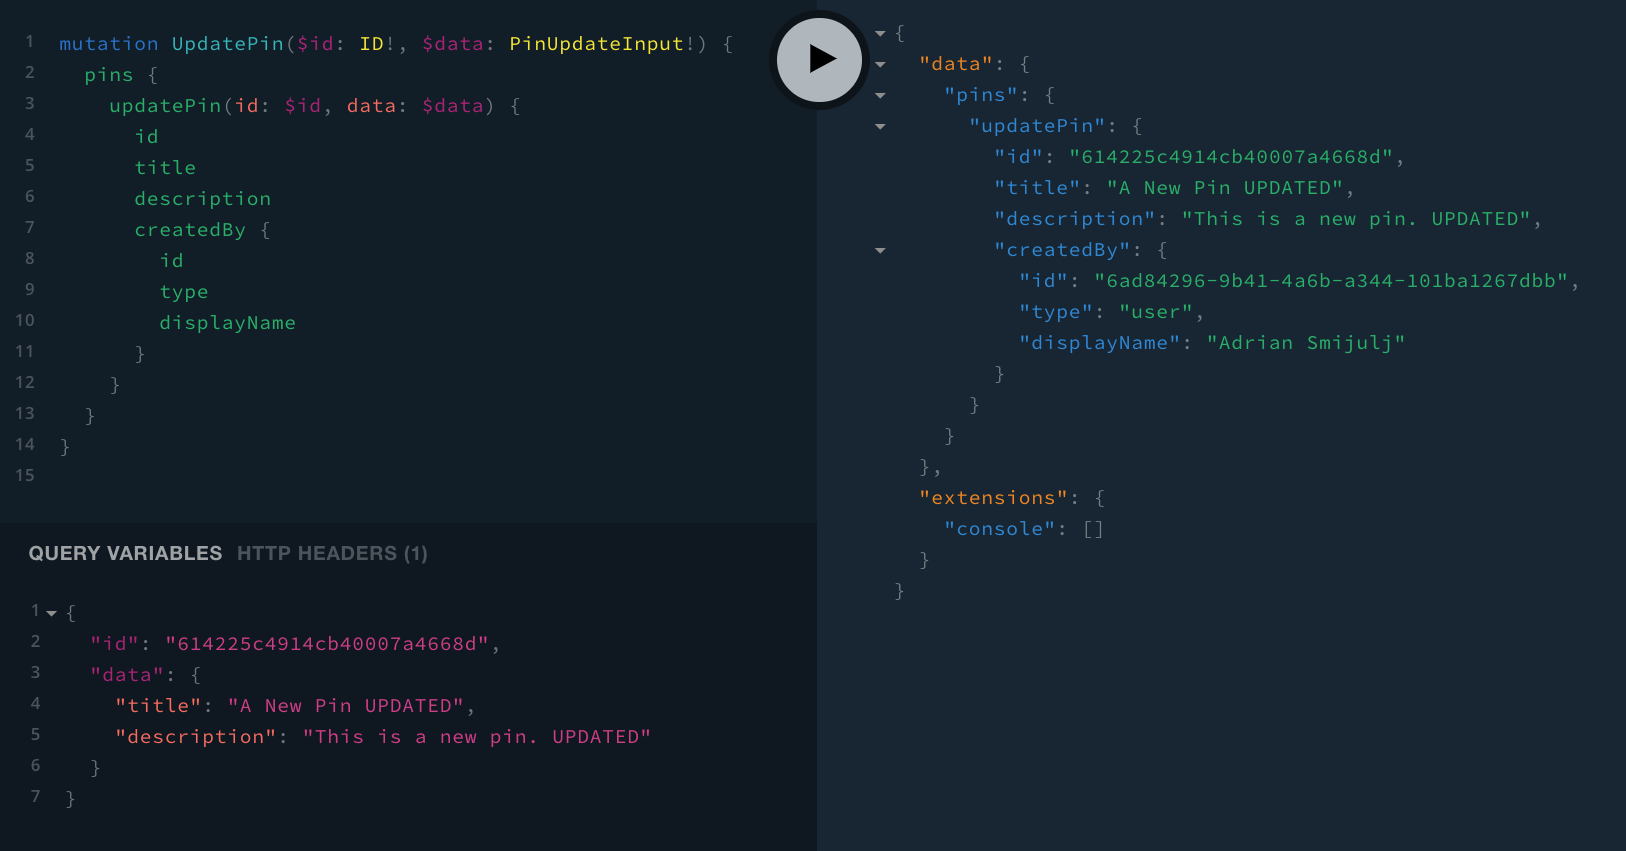
To manually test if this really works as intended, while signed in, we could create a new pin, and then immediately try to update it.
Once the pin is created, upon updating it, we should not receive the already seen Not authenticated. error response, because we’re signed in with the same user that created the pin:
Deleting Pins
Finally, let’s implement the same pair of checks that we performed in the previous resolver function, this time within the deletePin resolver function:
/** * Deletes and returns an existing Pin entry. * @param id */async deletePin({ id }: DeletePinParams) { // Before doing anything, let's make sure the user is signed in. const { authentication } = this.context; const identity = await authentication.getIdentity(); if (!identity) { throw new Error("Not authenticated."); }
// If entry is not found, we throw an error. const { Item: pin } = await Pin.get({ PK: this.getPK(), SK: id }); if (!pin) { throw new Error(`Pin "${id}" not found.`); }
if (pin.createdBy.id !== identity.id) { throw new Error("Not authorized."); }
// Will throw an error if something goes wrong. await Pin.delete(pin);
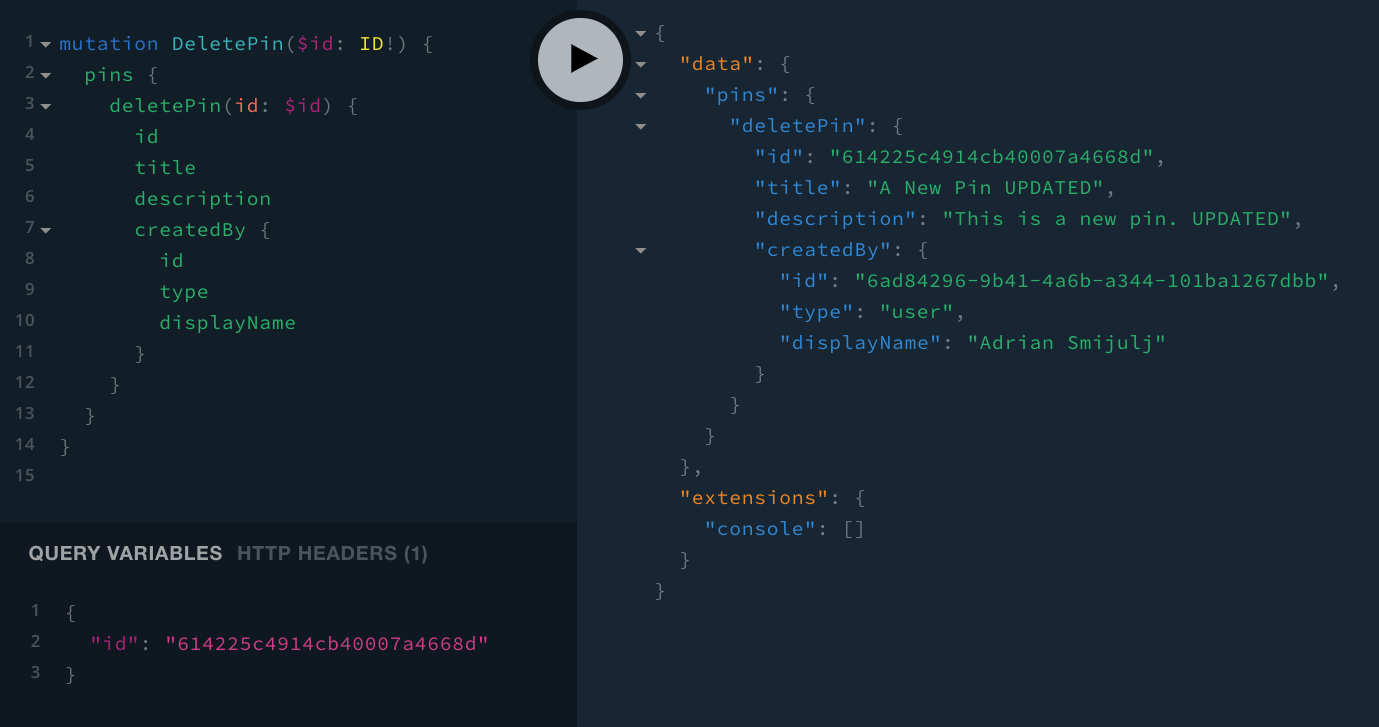
return pin;}In order to manually test this, we can use the same approach we used with the previous UpdatePin mutation. So, first we would create a new pin, and after that, simply delete it. If the user that tried to delete the pin is the same as the one that created it, then the mutation should be executed successfully.
mutation DeletePin($id: ID!) {
  pins {
    deletePin(id: $id) {
      id
      title
      description
      createdBy {
        id
        type
        displayName
      }
    }
  }
}{
"id": "PASTE_PIN_ID_HERE"
}
Final Result
By implementing the necessary authentication and authorization checks in the existing GraphQL mutations (in their respective resolver functions), we’ve made our application much more secure than it initially was:
- only signed in users can create pins
- when a pin is created, it is tied to the signed in user
- changes to existing pins can only be performed if the signed in user initially created the pin
- the same rule applies when it comes to deleting pins
In the next section, we’ll wrap up this section of the tutorial, by doing a small update on the Pin Details page and, finally, providing a short summary of everything that we’ve learned and built so far.