- how to use the Full Stack Application scaffold to start building a new custom application in no time
In order to follow this tutorial, you must use Webiny version 5.18.0 or greater.
The code that we cover in this section can also be found in our GitHub examples repository 
full-example 
Full Stack Application Scaffold
The best way to start building a new custom application would be to use the Full Stack Application scaffold, which will automatically generate all of the fundamental application pieces for us. This includes the following.
GraphQL API
A new GraphQL API created within a new project application in our Webiny project (more information below). Once deployed, we will use the Extend GraphQL API scaffold to extend it, meaning, create new GraphQL types, queries, and mutations.
Speaking of deployment, note that we’ll need to deploy the newly created GraphQL API before jumping to React application development, simply because the React application relies on it. This is also something the Full Stack Application scaffold will warn us about, and will offer to do it for us.
In order to host the GraphQL API, these are the cloud infrastructure resources that will get deployed:

Note that we will expand this infrastructure with a couple of additional resources, in the following sections of this tutorial.
React Application
A new React application created within a new project application in our Webiny project (more information below). Here, we won’t be relying on any existing scaffolds. Instead, in order to recreate the original Pinterest application’s user interface, we’ll simply use our existing React 


Note that, for development purposes, except having the GraphQL API deployed, we don’t need to perform any additional deployments. Frontend application development, or, in our case, React application development, can still be performed locally, on the developer’s machine. You only deploy it when you need to have it online.
In order to host the React application, these are the cloud infrastructure resources that will get deployed:

Running the Scaffold
In our terminal of choice, from our project root, let’s run the following command:
yarn webiny scaffold
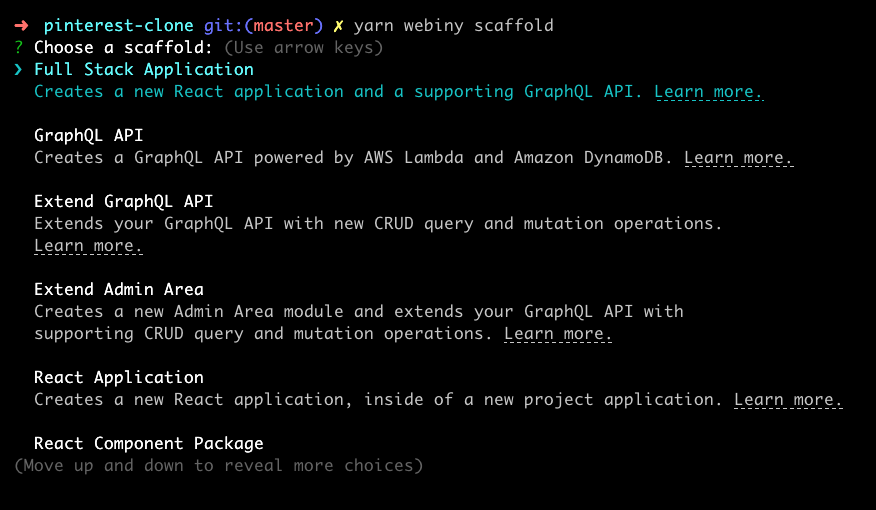
Running this command should give us the following list of available scaffolds:
Once we’ve selected the Full Stack Application scaffold from the list, we’ll get presented with the the following three questions:
- the name of the new full stack application
- the description of the new full stack application
- the path in which the new full stack application will be created
For the name, we’ll go with Pinterest Clone. For description and path, we’ll go with the provided defaults, where the path will automatically be set to pinterest-clone.
Once we’ve answered all of the questions, after a quick confirmation step, scaffolding will start. Once the process has been completed, we’ll also be asked about whether we want to include a simple GraphQL API example in the created application code. For now, we can go with no here.
Furthermore, we’ll also be asked about whether we want to immediately deploy the newly created GraphQL API. Here, it’s recommended we go with yes, and that’s what we’ll do. Note that the scaffold will use dev as the target environment.
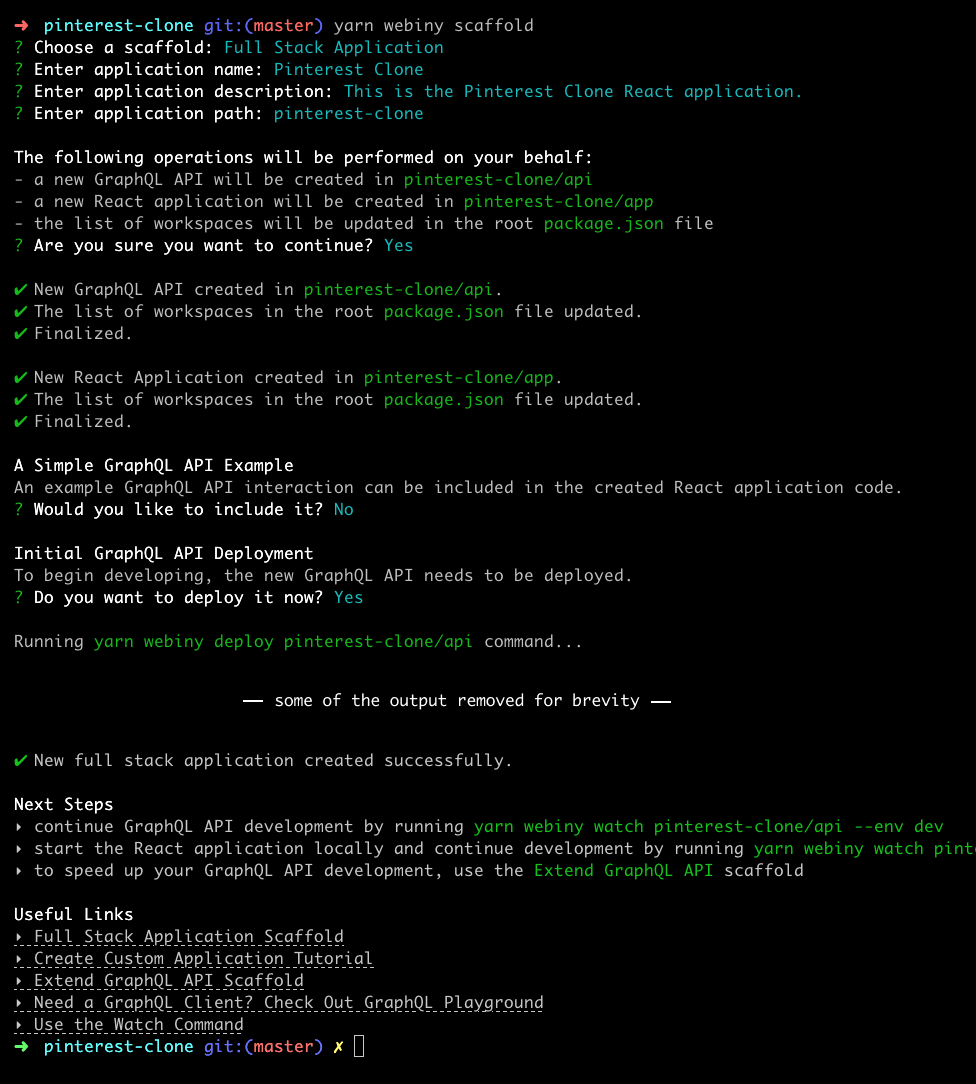
Ultimately, we should end up with the following output in our terminal:

As we can see, the scaffold created the GraphQL API inside the pinterest-clone/api 
pinterest-clone/app 
pinterest-clone
├── api                               # GraphQL API project application folder.
│   ├── code                          # Application code.
│   │   └── graphql                   # GraphQL API application code.
│   ├── pulumi                        # Cloud infrastructure code.
│   └── webiny.application.ts         # Project application's manifest file.
│
└── app                               # React application project application folder.
    ├── code                          # React application code.
    ├── pulumi                        # Cloud infrastructure code.
    └── webiny.application.ts         # Project application's manifest file.
Note that these folders are just project application folders. The actual application code will be located in pinterest-clone/api/code/graphql 
pinterest-clone/app/code 
Project application folders can be easily recognized because they always contain the webiny.application.ts manifest file. In our case, these are pinterest-clone/api/webiny.application.ts 
pinterest-clone/app/webiny.application.ts 
Also, take note of the pinterest-clone/api/pulumi 
pinterest-clone/app/pulumi 
In the following sections, we’ll be doing a couple of additions and modifications here, so stay tuned.
Using the Watch Command
Once the scaffolding process has been completed, it’s time to start building our application.
In order to do that effectively, we will need the webiny watch command, which ensures all of our application and cloud infrastructure code changes are detected, compiled, and automatically deployed into the cloud, when required.
Since two separate project applications were created in the scaffolding process, we’ll need to run two separate webiny watch commands.
GraphQL API
The following command starts a new watch session on our GraphQL API application code:
yarn webiny watch pinterest-clone/api --env devRunning the yarn webiny output pinterest-clone/api --env dev command from your project root displays all of the values that were exported from your cloud infrastructure code. That includes GraphQL API URL, Amazon DynamoDB table name, and more.
React Application
The following command starts a new watch session on our React application code:
yarn webiny watch pinterest-clone/app --env devOnce started, by default, the React application should be locally accessible via http://localhost:3001 
No Continuous Deployment Needed
In contrast to Admin App GraphQL API development, where the application code needs to be redeployed into the cloud as we’re making changes to it, React application can be developed locally. Meaning, once the watch command is run, no automatic deployments will be performed.
Why the --env Argument?
Note that we need to specify the environment via the --env flag, even when watching the React application. This is because the watch 
build 
When we say scripts need to pick up some of the values exported from GraphQL API’s cloud infrastructure code, we actually mean they need to retrieve our GraphQL API stack output. We’ll revisit this term in one of the following sections, so you’ll be able to get a better understanding of how it actually works.
Final Result
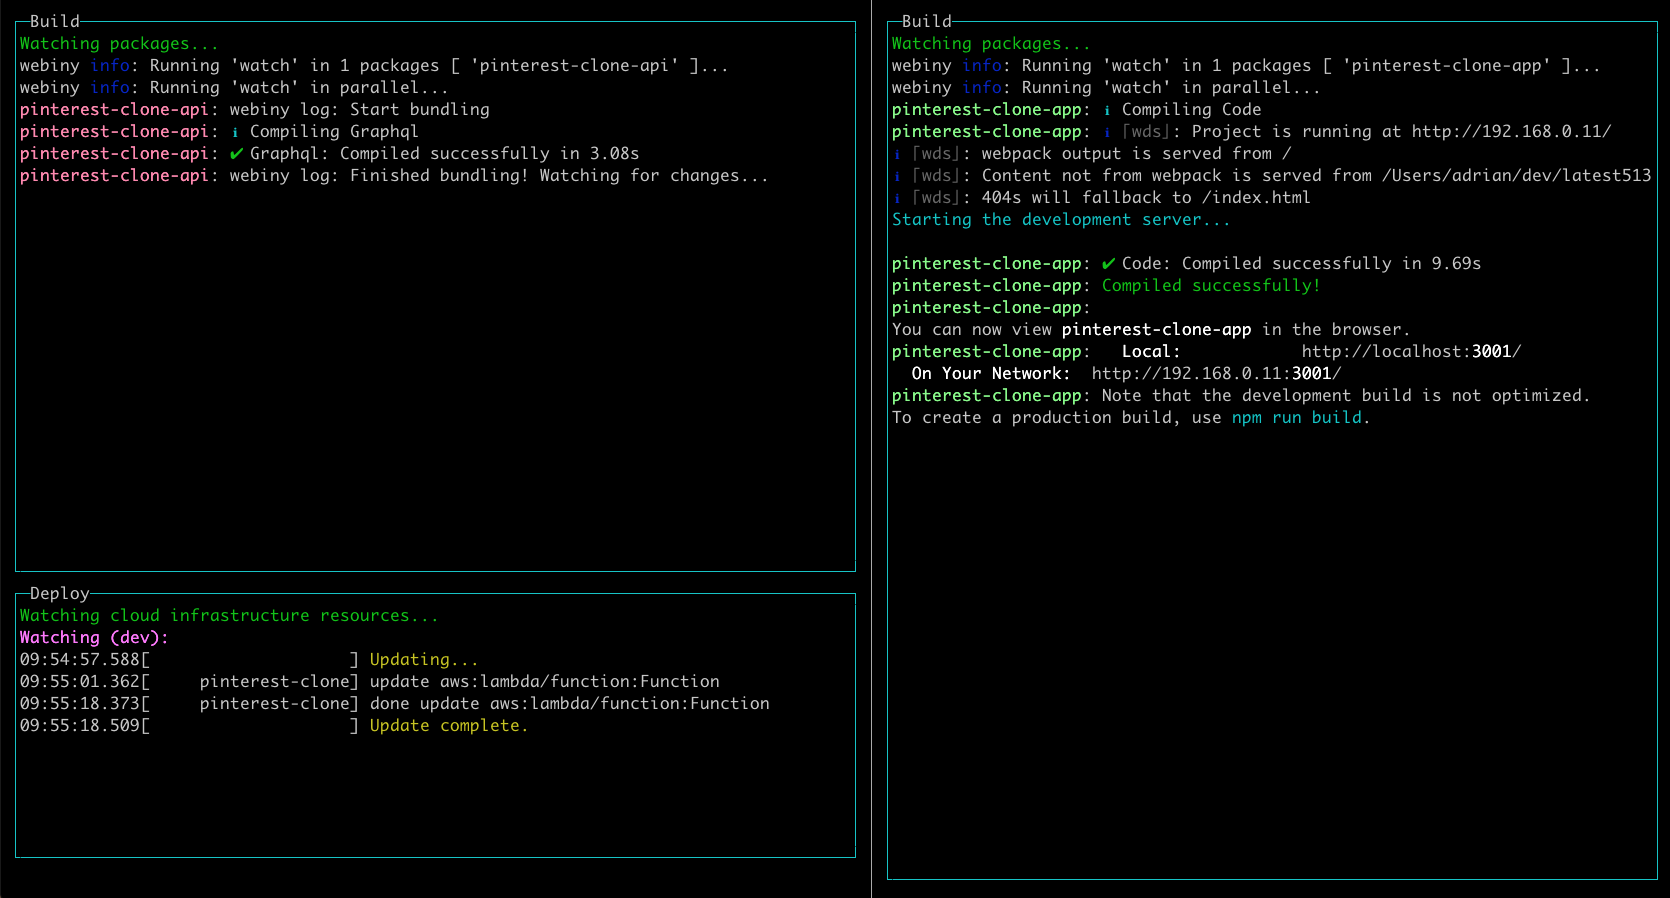
The following screenshot shows the two webiny watch commands run side-by-side in two separate terminal sessions:

Deployments
If, at any point, we just wanted to deploy our GraphQL API or React application, we can do that with the webiny deploy command.
GraphQL API
To deploy our GraphQL API, we can use the following command:
yarn webiny deploy pinterest-clone/api --env devReact Application
To deploy our React application, we can use the following command:
yarn webiny deploy pinterest-clone/app --env devEnvironments
Note that, throughout the whole tutorial, we’ll be using dev as the environment into which we’ll deploy our GraphQL API and React application.
FAQ
Which database is used in the generated GraphQL API application code?
The generated GraphQL API application code relies exclusively on Amazon DynamoDB 
Do I need to deploy the created React application in order to continue development?
No. As mentioned above, frontend application development can still be performed locally, on the developer’s machine. You only deploy the application when you need to have it online.
Into which environment the GraphQL API was deployed?
During the Full Stack Application scaffold’s setup, we get to decide whether we want to immediately deploy the newly created GraphQL API or not. If we choose yes, the GraphQL API will automatically be deployed into the dev environment.
