- how to quickly extend a GraphQL API with the Extend GraphQL API scaffold.
In order to follow this tutorial, you must use Webiny version 5.18.0 or greater.
The code that we cover in this section can also be found in our GitHub examples repository  . Also, if you’d like to see the complete and final code of the application we’re building, check out the
 full-example folder.
Overview
In the previous Getting Started section, we’ve seen how we can quickly scaffold a new full stack application that consists of a React application on the frontend, and a GraphQL API on the backend. So, now that we have these two in place, we’re ready to start building our custom application - a (super simplified) clone of the popular Pinterest social media service.
The central entity of our application is a pin. For the purposes of this tutorial, we’ll focus on the following three fields that belong to it:
- title - title of the pin
- description - a short description of the pin
- cover image - a URL to the cover image (shown while listing pins and viewing them separately)
With this in mind, let’s start by creating a set of basic GraphQL queries and mutations, which will enable users to perform essential pins-related CRUD operations.
For now, we won’t be dealing with security and the file upload functionality. We will tackle these separately in the upcoming sections of this tutorial.
Extend GraphQL API Scaffold
In general, a GraphQL API can be extended in two ways.
A more manual approach would be to create and register new GraphQLSchemaPlugin plugins, via which you define how you want to extend the GraphQL schema and all of the resolver functions. To learn more, take a look at the Extend GraphQL API guide.
On the other hand, a much faster way of extending the GraphQL API would be to use the Extend GraphQL API scaffold, which not only creates all of the boilerplate code, but also a set of essential GraphQL query and mutations, sets up the database connection, creates sample tests, and more.
For this tutorial, we’ll go with the second approach. So, in your terminal of choice, run the webiny scaffold command and pick the Extend GraphQL API from the list of all available scaffolds:
yarn webiny scaffold
Once we’ve selected the Extend GraphQL API scaffold from the list, we’ll get presented with the the following two questions:
- the path of the GraphQL API’s plugins folder
- the name of the initial entity
As the answer to the first question, we can simply use the pinterest-clone/api/code/graphql/src/plugins path, which should be automatically prefilled for us. As for the name of the initial entity, we’ll enter Pin.
Once we’ve answered all of the questions, after a quick confirmation step, scaffolding will start and eventually, we should end up with the following output in our terminal:
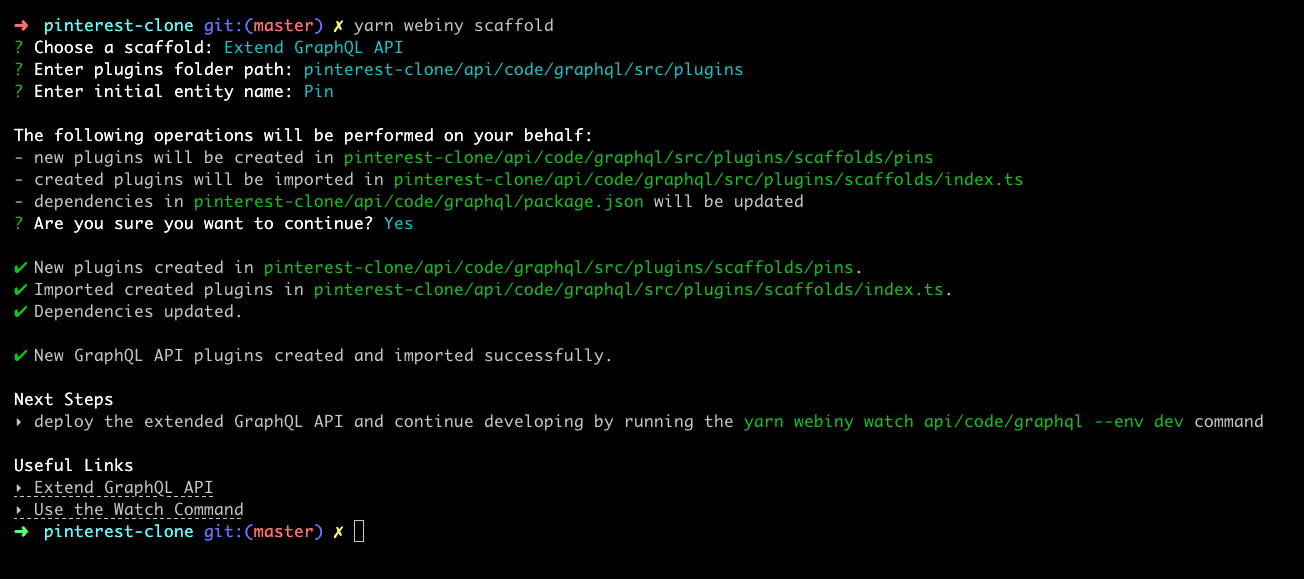
After the scaffolding process has been completed, we should end up with the following new GraphQL query and mutation operations in our GraphQL API:
- mutations:
- queries:
Notice how all of these ultimately return the Pin type, which is defined like the following:
type Pin {
  id: ID!
  title: String!
  description: String
  createdOn: DateTime!
  savedOn: DateTime!
  createdBy: PinCreatedBy
}
This is great because, as we can see, the type already contains two out of three fields we wanted our central Pin entity to have. The only field that’s missing here is the coverImage. Fear not, we’ll see how we can add this field soon.
For now, let’s just do a quick test of the changes that were initially performed by the scaffold.
In order to actually see the new operations in your GraphQL API, your application code needs to be redeployed. This can be done as usual via the webiny deploy, or, even easier, via the webiny watch command. The latter will not only deploy the changes, but also start a new watch session, which will automatically redeploy further application code changes, as you perform them.
For more information on how to use it, revisit the Using the Watch Command topic in the previous tutorial section.
Quick Test
Retrieving the GraphQL API URL
Before we continue, note that in order to do a quick manual test of our GraphQL API, we need to have the URL over which it can be accessed. This is where the following webiny output command can help us:
yarn webiny output pinterest-clone/api --env devRunning this command from your project root will display all of the values that were exported from your cloud infrastructure code, which is also known as stack output (more on this soon). This includes information like GraphQL API URL, Amazon DynamoDB table name, AWS region, and more.
Testing the CreatePin Mutation
Let’s say we wanted to quickly test all of the newly created GraphQL query and mutation operations. The easiest way to do that would be to use a GraphQL client, like for example the GraphQL Playground .
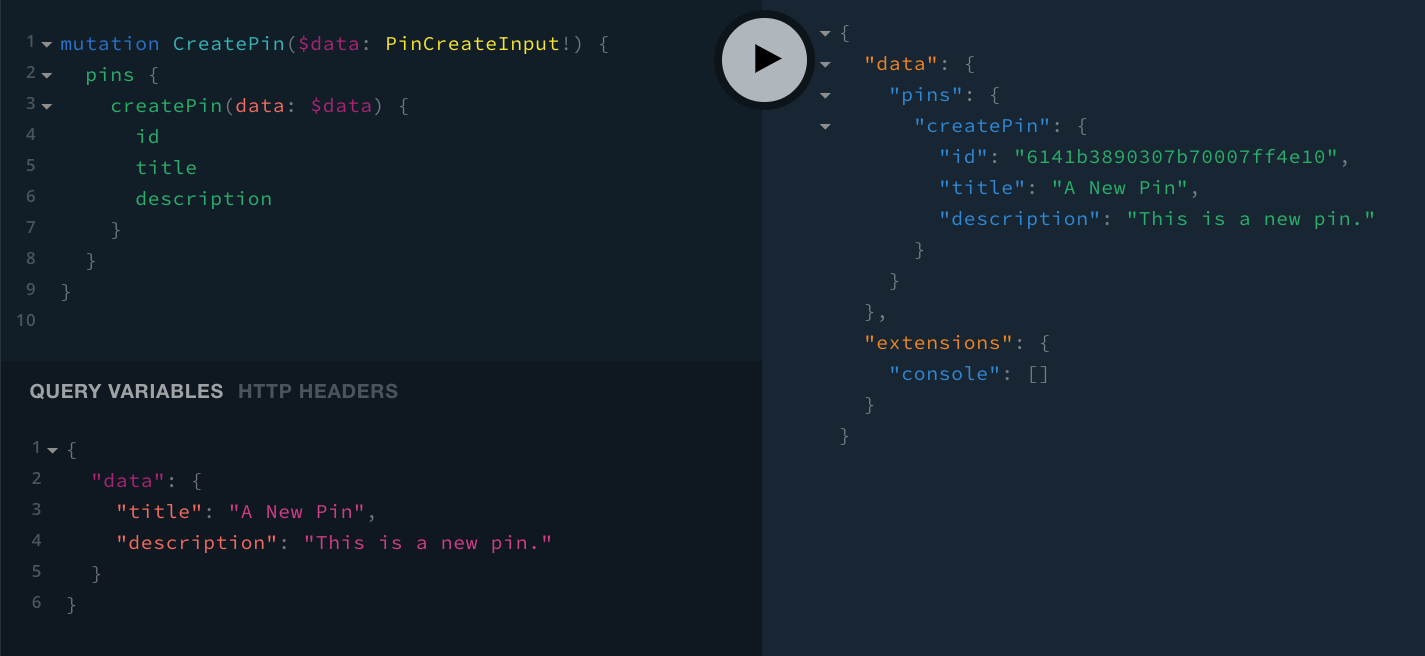
With it, we should be able to run the following CreatePin mutation:
mutation CreatePin($data: PinCreateInput!) {
  pins {
    createPin(data: $data) {
      id
      title
      description
    }
  }
}{
"data": {
"title": "A New Pin",
"description": "This is a new pin."
}
}Once run, we should receive a response similar to the following (the only piece of information that should be different on your end should be the returned id):
By default, query and mutation operations defined by the Extend GraphQL API are publicly accessible. For now, this is not a concern for us. As mentioned, we will tackle the security aspect of our application in the upcoming sections of this tutorial.
Feel free to play around with other queries and mutations. Once you’re ready to continue, in the following section, we’ll shift our focus on the GraphQL API application code and explore how we can add the missing coverImage field to our Pin GraphQL type.
Adding the coverImage Field
Adding the missing coverImage field can be done by making the following changes in the generated application code:
So, for starters, let’s open our Pin entity and simply define the new attribute on it (parts of code removed for brevity):
// https://github.com/jeremydaly/dynamodb-toolboximport { Entity } from "dynamodb-toolbox";import table from "./table";import { PinEntity } from "../types";
/** * Once we have the table, we define the PinEntity entity. * If needed, additional entities can be defined using the same approach. */export default new Entity<PinEntity>({table,name: "Pin",timestamps: false,attributes: {  PK: { partitionKey: true },  SK: { sortKey: true },  id: { type: "string" },  title: { type: "string" },  description: { type: "string" },  coverImage: { type: "string" },  createdOn: { type: "string" },  savedOn: { type: "string" },
  // Will store current version of Webiny, for example "5.9.1".  // Might be useful in the future or while performing upgrades.  webinyVersion: { type: "string" },},});
The application code generated by the Extend GraphQL API scaffold relies on DynamoDB Toolbox , which is a library that makes it a bit easier to interact with Amazon DynamoDB. The Entity class we’ve seen in the above code sample is part of it.
For more information, check out the Storing and Retrieving Data section in the Extend GraphQL API scaffold guide.
Notice how we’re passing the PinEntity interface upon instantiating the Entity class. Since the interface is essentially listing all attributes that our entity consists of, let’s update it as well:
export interface PinEntity {PK: string;SK: string;id: string;title: string;description?: string;coverImage?: string;createdOn: string;savedOn: string;webinyVersion: string;}Finally, let’s update our Pin GraphQL types in our schema, located in the typeDefs.ts file:
export default /* GraphQL */ `  type Pin {      id: ID!      title: String!      description: String      coverImage: String      createdOn: DateTime!      savedOn: DateTime!  }
  input PinCreateInput {      title: String!      description: String      coverImage: String  }
  input PinUpdateInput {      title: String      description: String      coverImage: String  }
  (...)`;
With the webiny watch command up and running, the performed application code changes should be automatically rebuilt and redeployed into the cloud.
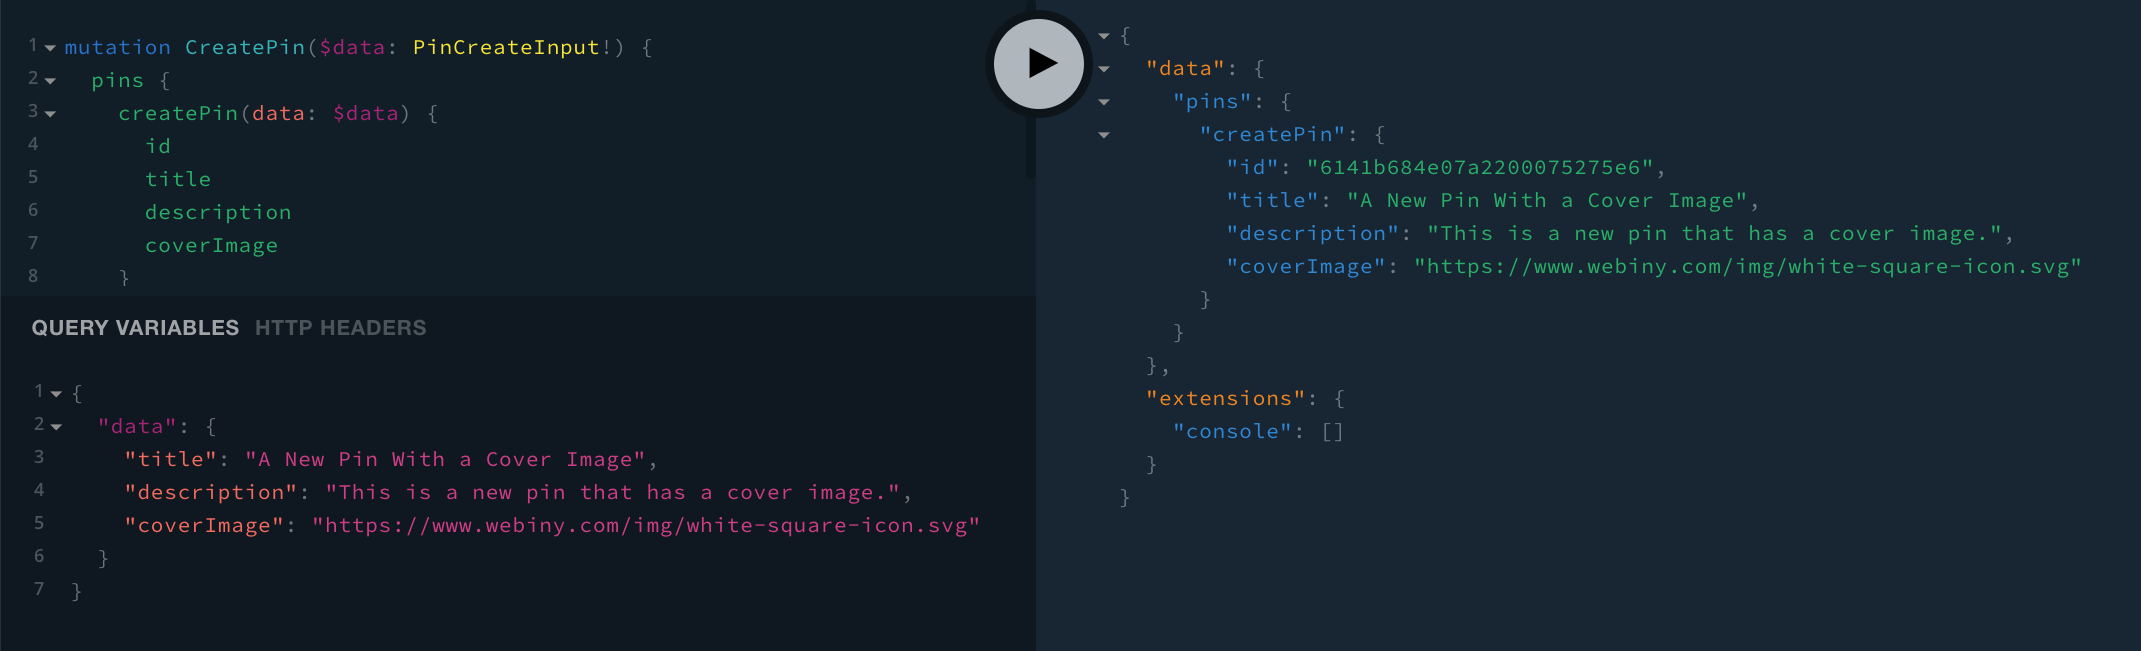
If everything was done correctly, we should be able to see the newly added field via our GraphQL client and use it upon performing different queries and mutations. In the following example, we’re again running the same CreatePin mutation, although this time we’re also including the coverImage field:
mutation CreatePin($data: PinCreateInput!) {
  pins {
    createPin(data: $data) {
      id
      title
      description
      coverImage
    }
  }
}{
"data": {
"title": "A New Pin",
"description": "This is a new pin.",
"coverImage": "https://www.webiny.com/img/white-square-icon.svg"
}
}
If you’re using the GraphQL Playground client, note that it may not immediately reflect the changes you made to the GraphQL schema. You may need to refresh the currently opened tab or even restart the whole application in order for it to become completely up-to-date.
Next Steps
Now that we’ve defined our fundamental Pin GraphQL type and the related set of CRUD GraphQL queries and mutations, we can switch to frontend, and start building our React application.
But, do note that we’ll still be returning to our GraphQL API. As already mentioned, we’ll still need to implement a couple of missing pieces here. Most importantly: security and the image upload functionality. We will tackle these separately in the upcoming sections of this tutorial.
FAQ
Which database is used in the generated GraphQL API application code?
The generated GraphQL API application code relies exclusively on Amazon DynamoDB for storing and retrieving data. Of course, you’re certainly free to bring your own databases and import different database clients, if need be. In essence, this will require you to remove the Amazon DynamoDB table definition in the cloud infrastructure code, and integrate the preferred database and a database client in your application code.
I see DynamoDB Toolbox is being used for interacting with Amazon DynamoDB. Can I use a different library?
Yes, you can, but this is not something that can be done automatically. The library replacement will need to be done by you, manually. One of the libraries you could use is the default AWS DynamoDB Document Client , but feel free to bring the one you prefer the most.